Setting up a Rasberry Pi is not that simple especially for first time Pi builders. In this case, having a backup of your Raspberry Pi’s system is essential. You would have a fail-safe if things go wrong with your project.
If you are about to update your Raspberry Pi or trying new builds and projects with your Raspberry it is always a good idea to backup your Raspberry Pi’s SD card before doing anything else.

Today, we are going to show you how to backup your Raspberry Pi SD Card on Windows computers.
Let’s get started, shall we?
Backup Your Raspberry Pi SD Card On Windows
- First, open your computer and insert the Raspberry Pi SD Card.
- Then, download the Windows Imaging Program.
- After downloading the imaging tool, Launch Win32 Disk Manager.
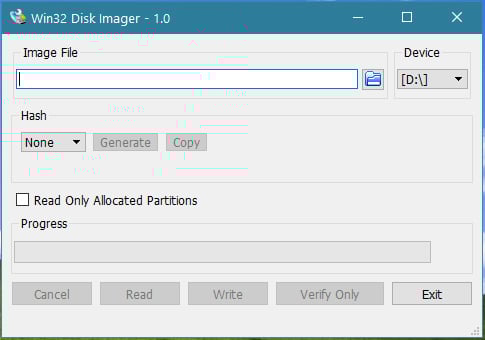
- Now, click on the Blue Folder Icon in the upper middle part of the screen. You will need to select a location where your backup would be saved.
- Next, beside the Blue Folder, there is a drop-down menu where it displays all the external devices connected to your computer. Find your Raspberry memory card and select it.
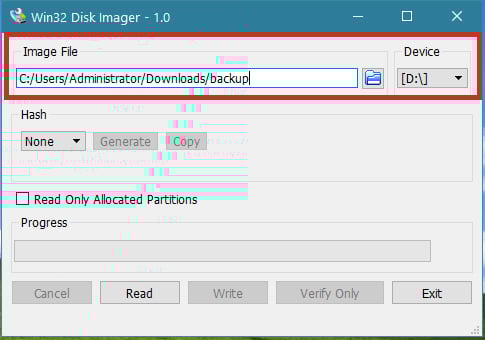
- Last, Click on the Read button which is located at the lower part of the screen. Then, wait for the process to finish. A “Read Successful” message box will appear once the backup is completed.
Now, after successfully backing up your Raspberry SD card. We are going to show you how to restore this backup in case your Pi’s memory card got corrupted or your system broke down.
How to Restore Raspberry Pi Image
- Open your computer and insert your Raspberry Pi’s SD card.
- Next, Launch the Win32 Disk Imager tool.
- Then, click on the Blue Folder button which is located in the middle of the screen. Now, find the location of your backup file and open it.
- After locating the backup file of your Raspberry Pi, click on the drop-down menu next to the blue folder and select the SD card of your Raspberry Pi.
- Now, click on Write to start restoring the backup image to your Raspberry Pi’s SD Card. This process may take a while depending on the speed of your memory card and the file size of the image.
- Lastly, now that your Raspberry Pi’s image is restored, you can insert it back to your Pi and try using it.
To have a backup is crucial before formatting any SD card.
Learn more on formatting Raspberry Pi SD Card: Guide to Formatting Your Raspberry Pi SD Card (Step-by-Step).
Best Raspberry Pi SD cards
Here are our 2 recommended Raspberry Pi SD cards:
No products found.
No products found.
To find more Raspberry Pi SD cards read: What’s the Best SD Cards for Raspberry Pi 4?
If you like this article please share it with your friends and colleagues 🙂 Thanks!
Related Articles:
- 7 Best SD Card for Security Camera & CCTV
- SD Card For Wyze Camera
- 7 SD Cards for Your Amazon Fire Tablet
- 5 Best Swipe Magnetic Card Reader